Download _best_ - Madbros
This comprehensive guide breaks down how to securely download, install, and configure each respective "MadBros" product to ensure you find exactly what you are looking for. 1. ModBros MoBro (PC Hardware Monitor)
Abandonware sites offer another option for downloading Mad Bros. These sites provide access to classic games that are no longer commercially available. However, be aware that downloading games from abandonware sites may be considered illegal in some jurisdictions.
There has never been a better time to join the brotherhood of chaos. The process is straightforward if you stick to official channels—Google Play, Apple App Store, or Steam. Avoid shady third-party sites, meet the device requirements, and prepare for some of the most inventive co-op action in modern gaming.
It aggregates data from common tools like HWiNFO or Open Hardware Monitor, presenting stats like temperature and CPU load in a single, customizable UI. madbros download
Frequent updates provide new content without requiring a secondary purchase. Tips for a Safe Download
This complete download guide covers both ecosystems, providing direct instructions, feature overviews, and system requirements to ensure you safely download the correct file. Option 1: MoBro System Monitoring Software (ModBros)
: Adds a custom "Madbros Boss" entity to the game, along with specific items like a new gun and "soda fluid". Version Details Latest Version : 1.2 (Released April 23, 2022). Compatibility : Designed for Minecraft version Download Location : Hosted on CurseForge Music & Audio Downloads This comprehensive guide breaks down how to securely
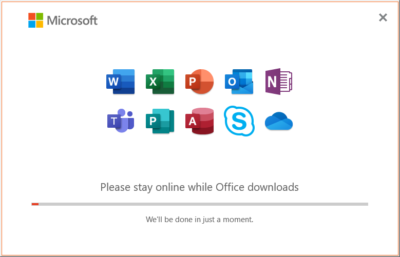
Setting up the system involves installing the server on your PC and the client app on your chosen display device. 1. Download the Windows Server
This setup is ideal for PC enthusiasts and builders who want to keep an eye on their system's performance without needing a separate monitor or running clunky software in the foreground. It offers a high degree of customization, allowing you to tailor which metrics are displayed.
Users often report that other monitoring apps can be finicky or require heavy configuration. Reviewers have noted that These sites provide access to classic games that
A client application for Android or Raspberry Pi that displays these stats on a secondary screen over your local network. 2. Installation and Setup To use these tools effectively, follow these core steps:
: Upon installation, the game should only ask for necessary permissions (like storage for game data). Be wary if it asks for access to your contacts or SMS.

17 Comments
It could be so simple. Always ask your wife first.
Has been working fine for me for almost 25 years now. ;)
one ntfs partition on usb key in uefi boot (with or without SecureBoot) isn’t fully supported. use fat32, rufus make it.
Thank you! After watching countless videos and reading many how to articles I stumbled on yours. I simply changed the 3.0 setting to auto from enabled and my operating system loaded right away.
Where is said 3.0 setting?
Thank you. Nearly blew my brains out thinking I couldn’t boot from USB anymore
You saved me, this is very valuable information. Thank you!!
I was having the same problem on windows 10, and I believe it was because of how I’d formatted my USB stick. Originally I had just created a partition as FAT and was able to load many different ISOs onto the device. Then I made a mistake and had to re-format(?) the whole device, which included re-making the file/partition table. Originally I just chose the default “Scheme”, “GUID Partition Map”. From this point on I was having trouble. I had a hunch that it might require the “Master Boot Record” scheme, so I erased the whole USB stick again with that setting. Then when I ran unetbootin again it worked without issue.
I was having the issue of my USB stick not being detected by BIOS, i solved it by using the latest version of Rufus 3.13 instead of using the old one 3.8 version.
Thank you so much. It really was USB 3…
USB2 flash drive made no difference for me.
My problem was the USB 3.0
Just plugged him in a 2.0 input and it worked. Thank you so much!
For older laptops with both 3.0 and 2.0 USB, try putting the 3.0 USB stick into the 2.0.
Switching from USB 3 to 2 saved my sanity. Thanks!
I switched ports and this made it work – I was using a 3.2 usb and apparently the side port on my laptop wasn’t working
Thanks, my old computer can only find usb drive from cold boot, and it is a usb 3 in usb 2 port, or you have to plug it into usb port when computer is booting right after memory checking; otherwise the computer won’t find this usb3 drive.
Great post, Helge! I tried all the steps you mentioned and finally got my USB drive to show up in the BIOS. Your clear instructions made the process so much easier. Thanks for sharing!
Thank you for this informative post, Helge! I was struggling with my USB drive not appearing in the BIOS, and your troubleshooting steps helped me pinpoint the issue. It’s good to know about the USB formatting and BIOS settings—I’ll definitely keep those in mind for future setups. Appreciate your insights!