Samsung B75s1 Bios (360p UHD)
The Samsung B75S1 is a reliable, budget-friendly motherboard, but its BIOS holds some challenges.
Select your USB drive to boot into the FreeDOS command prompt.
Once inside the BIOS, you will be met with a legacy or early UEFI interface. Here are the most critical settings:
For modern operating systems like Windows 10/11 installed on GPT partitions. Samsung B75s1 Bios
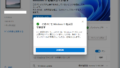
: This Windows-only utility automatically checks your current firmware version against Samsung’s servers and performs the flash within the OS environment.
Do not change this setting from IDE to AHCI if Windows is already installed, as it will result in a Blue Screen of Death (BSOD). If necessary, change this setting before a fresh Windows installation. 3. Secure Boot and TPM (Windows 11 Compatibility)
Wait until the utility indicates a 100% successful flash. Here are the most critical settings: For modern
Note: If Windows boots, you may have pressed F2 too late or need to disable Fast Startup in Windows. 2. Navigating the Samsung B75s1 BIOS The BIOS is divided into several sections:
If left on IDE mode, modern SATA SSDs will lose up to 50% of their read/write speeds, and advanced features like TRIM will not function.
This comprehensive guide covers everything you need to know about the Samsung B75s1 BIOS, including how to access it, critical update procedures, advanced settings, and troubleshooting common errors. Technical Specifications: Samsung B75s1 Overview If necessary, change this setting before a fresh
Understanding and Updating the Samsung B75S1 BIOS: A Complete Guide
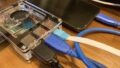
Turn off the computer, unplug the power cable, open the side panel, locate the silver coin battery on the motherboard, and replace it with a fresh CR2032 battery. Re-enter the BIOS to configure your settings one final time. Issue 4: Bricked Motherboard (Failed Flash)
Reset any custom RAM or system tweaks to factory defaults before proceeding. Step 1: Locating the Proper Firmware File